Properly exporting glTF from Blender (3.4+) for use with Bevy (0.9+)
This post explains how to properly export and integrate models from Blender to Bevy using the glTF file format. Furthermore, we include scripts to automate these tasks.
Published on: 2023-01-07
Word count: 3207
Estimated reading time: 17 minutes
Context
Bevy (or Bevy-Engine) is
“A refreshingly simple data-driven game engine built in Rust Free and Open Source Forever!”
– Bevy
Many people turn to Blender, a Free and Open-Source 3D-Suite, when creating assets for their Bevy game.
And there is the problem: Blender uses it’s own file format .blend, while also being able to export into many different formats like .obj, .fbx, .gltf and many more.
Blender can also render images and whole movies.
The question now becomes:
What is the best format to use when exporting from Blender to be used with Bevy, and how is this done the best way?
Before we head into any details I want to make my intentions clear:
First of all, I had trouble finding any up-to-date resource on this. There are a few blog posts explaining (very) roughly how to do this, but none is up-to-date as of writing this and all came with a lot of problems. This blog-post is intended to be an up-to-date resource for others.
Secondly, this guide is written for Blender version 3.4 and Bevy 0.9.
Both, Blender and Bevy, are still working on glTF support.
Thus, things may change in the future.
Thirdly, my goal was also to automate this process using Python scripts.
Said scripts will be included here and can be freely used if credited.
Lastly, this guide expects some very basic skills in Blender, Bevy and Rust. The python scripts can be used without any Python knowledge.
If you run into any trouble, need help or found an issue with my write-up, please open an issue or start a discussion on my GitHub repository!
Why glTF
Blender and Bevy both support many different formats. Choosing the right one can be a challenging task.
The main problem with most formats is that they are proprietary. Usually meaning: hard to license and official parsers and writers are either closed source or don’t exist at all. This often leads to partial implementations of said parsers/writers which may or may not work and different applications may use different parsers/writers making them incompatible with each other.
glTF is different in those regards.
glTF™ is a royalty-free specification for the efficient transmission and loading of 3D scenes and models by engines and applications. glTF minimizes the size of 3D assets, and the runtime processing needed to unpack and use them. glTF defines an extensible, publishing format that streamlines authoring workflows and interactive services by enabling the interoperable use of 3D content across the industry.
This is ideal for us! Not only area there official libraries, but the whole standard is defined in a specification document readable by everyone. This enables glTF to be used universally.
glTF also supports three versions of it’s format:
.gltf: A JSON-like format that describes everything in a human-readable fashion. Slower to process and read but easier to debug and change things quick (if you aren’t exporting them)..glb: A binary format that is optimized for loading and streaming inside engines..gltf + .bin: A mixture of both where the main values (like settings, locations, etc.) are stored in a JSON-like format (.gltf) and things like models, meshes, textures, meshes are compressed into a binary (.bin). However, loosing either of the files invalidates the whole file.
Additionally, glTF supports a wide range of things you can pack into it.
Primarily, we are interested in:
- Models
- Meshes
- Textures
- Materials
- Scenes
And luckily glTF can do all of this! … with some caveats as we will find out.
However, there is also a downside:
glTF is relatively new (as of writing this) format. While Blender and Bevy both implement it, there are features missing on both ends. However, there are also lots of workarounds for those missing features. glTF is currently very well priced as THE next format in anything that uses graphical engines and is very likely to be fully implemented within no time at all.
Exporting
This guide will cover two ways of exporting glTF from Blender to be used by Bevy:
- Manual Exporting
- Automated Exporting
Both ways require the same setup, but we will start with manual exporting to show the full workflow. Let’s start there.
Project Setup
First, let’s create a new Blender Project and add some model. You can delete or keep the default cube, camera and light, or delete them. important point is to have a or multiple model in your project like so:

Manual Exporting
With this setup, we can click on File > Export > glTF in the top left corner:
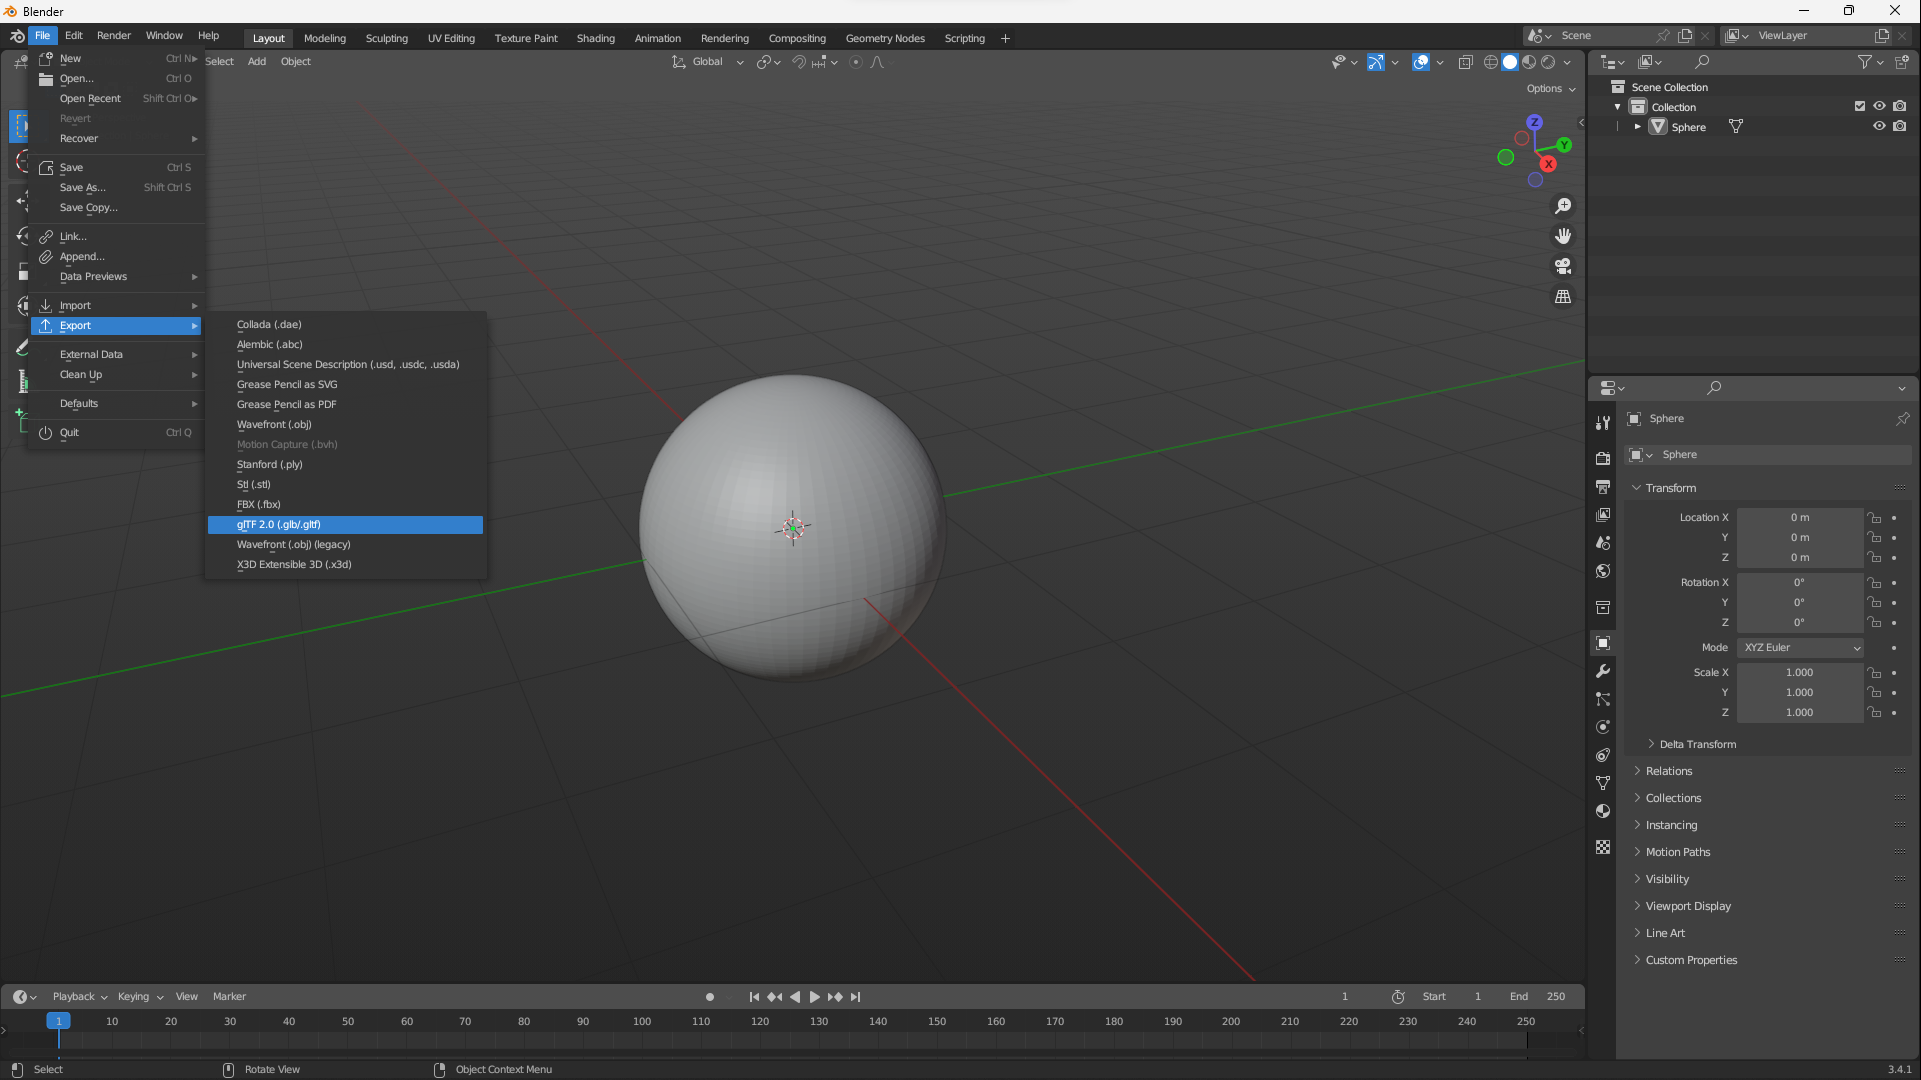
In the new menu we can select a location for the glTF to be saved, but before clicking on export look to the right side! These settings are essential for Bevy to properly import this model.
First of all, you can choose the format there like mentioned above:
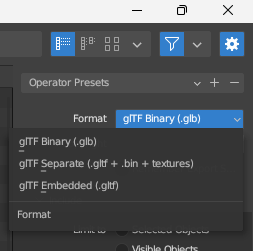
This format is for you to choose, Bevy will work with any of the three.
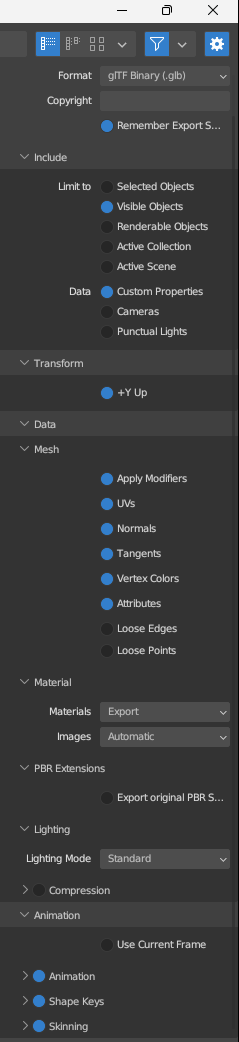
Next, make sure to have these settings:
Tip: If you select “Remember Export Settings” at the top under Copyright Blender will remember these settings in this
.blendfile. Making exporting much faster in the future.
Here is a short overview:
Include > Limit to defines what gets into the glTF file.
It doesn’t matter what you chose here, but generally Visible Objects is a good choice. You can hide whatever you don’t want in your glTF.
Include > Data defines what data is included. Check Custom Properties, this includes extra data and makes it easier work with glTF inside Blender later. You can export Lights and Cameras from Blender but you loose control over them inside Bevy.
Furthermore, specific files like a scene or player may include those, but don’t pack cameras and lights into every mesh export you do.
Transform > +Y Up should be checked.
This is the orientation Bevy uses.
Data > Mesh defines how our Mesh is exported.
Check whatever you need. However, it may be a good idea to export “everything but Loose*” by default to ensure the model is in Bevy as close as possible to Blender.
Data > Material defines how our Materials are exported. Set Materials to Export and Images to Automatic. This will export all used Materials by default and convert them if needed.
Note that Blender currently only exports in PNG and if it’s another format they will be converted to either PNG or JPEG. Something like KTX2 or DDS are much better for graphical engines but are nto yet supported by Blender. Bevy needs a special feature flag for those.
Data > PBR Extensions defines how PBR Materials are exported.
I couldn’t find a difference between the options. Exporting with the Blender default will probably get you the closest to how it looks in Blender.
Data > Lighting defines how lighting is exported. Standard light works very well with Bevy.
Data > Compression defines if the glTF is compressed (if the format .glb or .gltf + .bin is selected).
Bevy does not support this compression at the moment. Thus, turn this off!
Animation defines how Animations are exported. Let them at default settings, this guide is not about Animation exports.
With this we can hit the Export glTF button and save the file.
Bevy Usage
Inside your Bevy project we need to define a new System:
fn scene_renderer(
    mut commands: Commands,
    assets: Res<AssetServer>,
) {
    // ...
}
Now all we need to do to load out glTF file is:
- Load it with the
AssetServer - Tell
Commandsto spawn aSceneBundle
commands.spawn(SceneBundle {
    scene: assets.load("assets/scene.gltf#Scene0"),
    ..default()
});
In this case I exported the glTF file into
assets/scene.gltf. Your file may be with a.glbextension if you choose the binary format and may be in a different path. Adjust accordingly.
Now there is one weird bit here: The #Scene0 at the end.
As we established, glTF supports a wide range of use cases. The hashtag (#) tells the AssetServer to not load the whole file, but a specific section of that file. In our case we load Scene0 which is always the first and default scene of this file. There could be multiple scenes in our glTF and we could access them with Scene1, Scene2, …, SceneX.
It’s important to know that if you don’t add the #Scene0 (or similar) to the file-path, Bevy will load the whole file and will require you to do some more manual work on what needs to be spawned where.
Furthermore, we could load just the Mesh with
#Mesh0.
Export to.gltf(JSON-like format) and open it in your code editor if you are curious about what there is.
Now all we need to do is call this System like so:
app.add_startup_system(Self::scene_render);
Below you will find the full example. However, your implementation may vary wildly of this. I’d also recommend putting this into a plugin and calling it based on an AppState.
fn scene_renderer(
    mut commands: Commands,
    assets: Res<AssetServer>,
) {
    commands.spawn(SceneBundle {
        scene: assets.load("assets/scene.gltf#Scene0"),
        ..default()
    });
}

// Somewhere in our plugin init _or_ main
app.add_startup_system(Self::scene_render);
That’s it. You should see your model appear inside Bevy.
If you can’t see it take a look into Bevy’s log and check if the path and export is correct.
You can also open a new Blender project and File > Import > glTF to validate what was exported!
Adding materials
Now… this seemed to simple, didn’t it?
If you now add a simple Material to your Model in Blender everything will work fine.
But just one colour is kinda boring, isn’t it?
Try using the Shading Nodes in Blender for your Material.
Inside Blender it will look fine, no matter what you do. Try exporting it as a glTF and then reimport into Blender.
Still, everything looks fine (assuming you applied the export settings correctly).
But now try importing the glTF into Bevy.
There are some (very little) things that will work inside Bevy. You may be lucky and it just works, but that’s a rare case. Most likely you will get a StandardMaterial inside Bevy that has a light-yellow standard colour. That’s no good.
The problem is that Blender has it’s shading nodes and some (but rarely if at all) translate to glTF shading, while Bevy has it’s own Material and Shading system. Again, some of glTF features include Materials and Shading but neither does Blender export it “correctly” at the moment, nor does Bevy import it “correctly”.
In the future Blender and Bevy may play nicely with glTF Materials.
Now how do we fix this?
The solution sounds complicated at first but is actually a very easy process!
Here is what we need to do:
- Create a uniform object to apply our Material on (e.g.
Plane). - Apply our Material on this object.
- Inside the Material create a
Texture Node(no need to attach it). - Create a new Texture from the
Texture Node. - Change Blender to Cycles (
Render Properties > Render Engine). - Under
Render Properties > Bakemake some changes and hit theBakebutton. - Ensure Blender bundles Textures (
File > External Data > Automatically Pack Resources) (or: Save the Texture externally). - Go back to our original object and add a new Material.
- Open the new Material in the Shading Nodes.
- Import the created Texture and use it as our Color.
Note that this only covers the “Diffuse” Map (i.e. color), but you can repeat those steps for e.g. Normals, Roughness, etc.
How does this work? How does this change things?
Simple! The “baking” creates a Texture for us. This Texture is then imported and used as our Material. glTF supports Textures and so does Bevy! When importing into Bevy, the Texture will be unpacked from the glTF and applied. No custom Blender nodes involved!
The downside of this is that we now have a two-step process:
Bakethe Texture.- Export to glTF.
However, if there hasn’t been changes to the Material there is no need to Bake!
Assuming Blender packed the Texture correctly first time.
Now let’s see how this is done:
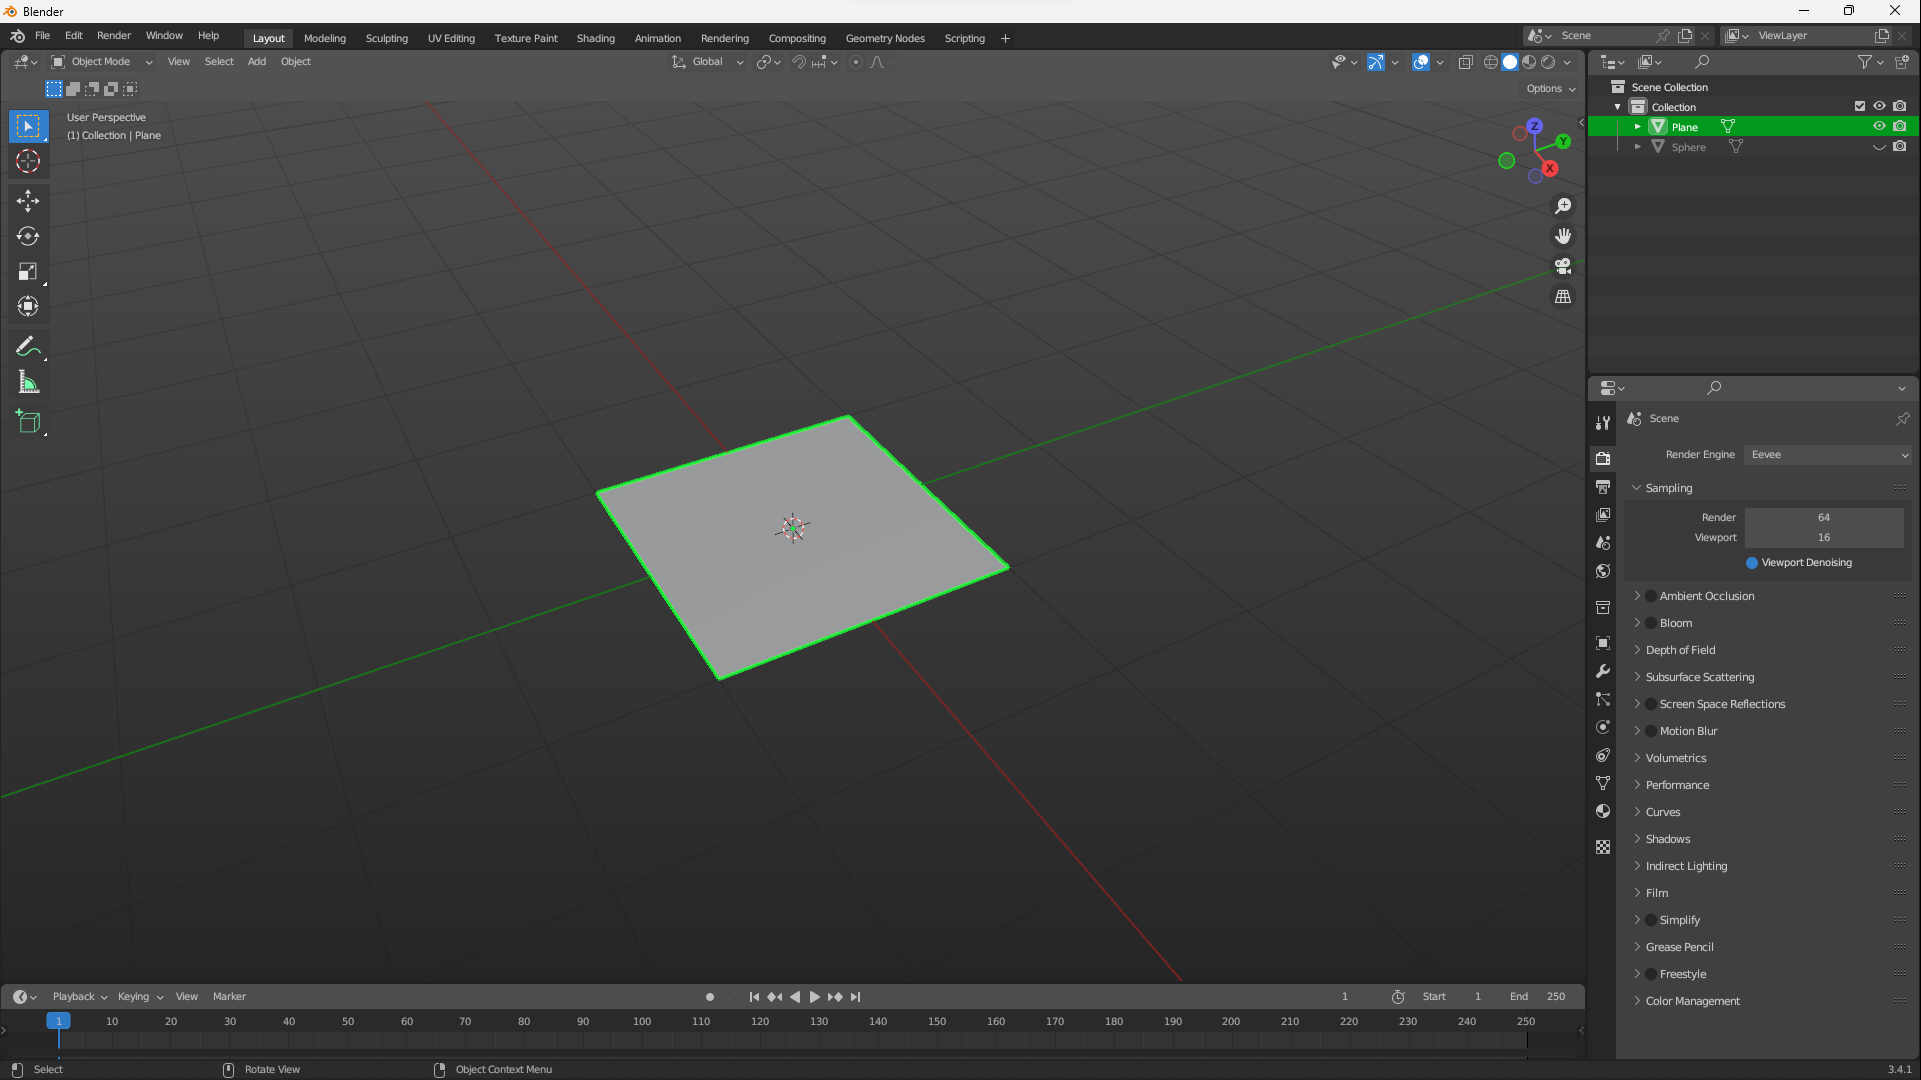
First, we need to create a uniform object in Blender.
For our use-case a Plane works the best, but other use-cases may use any other shapes.
Make sure to disable Viewing and Rendering of the original Object!
Next, we apply the Material (or create a new one) to the Object:
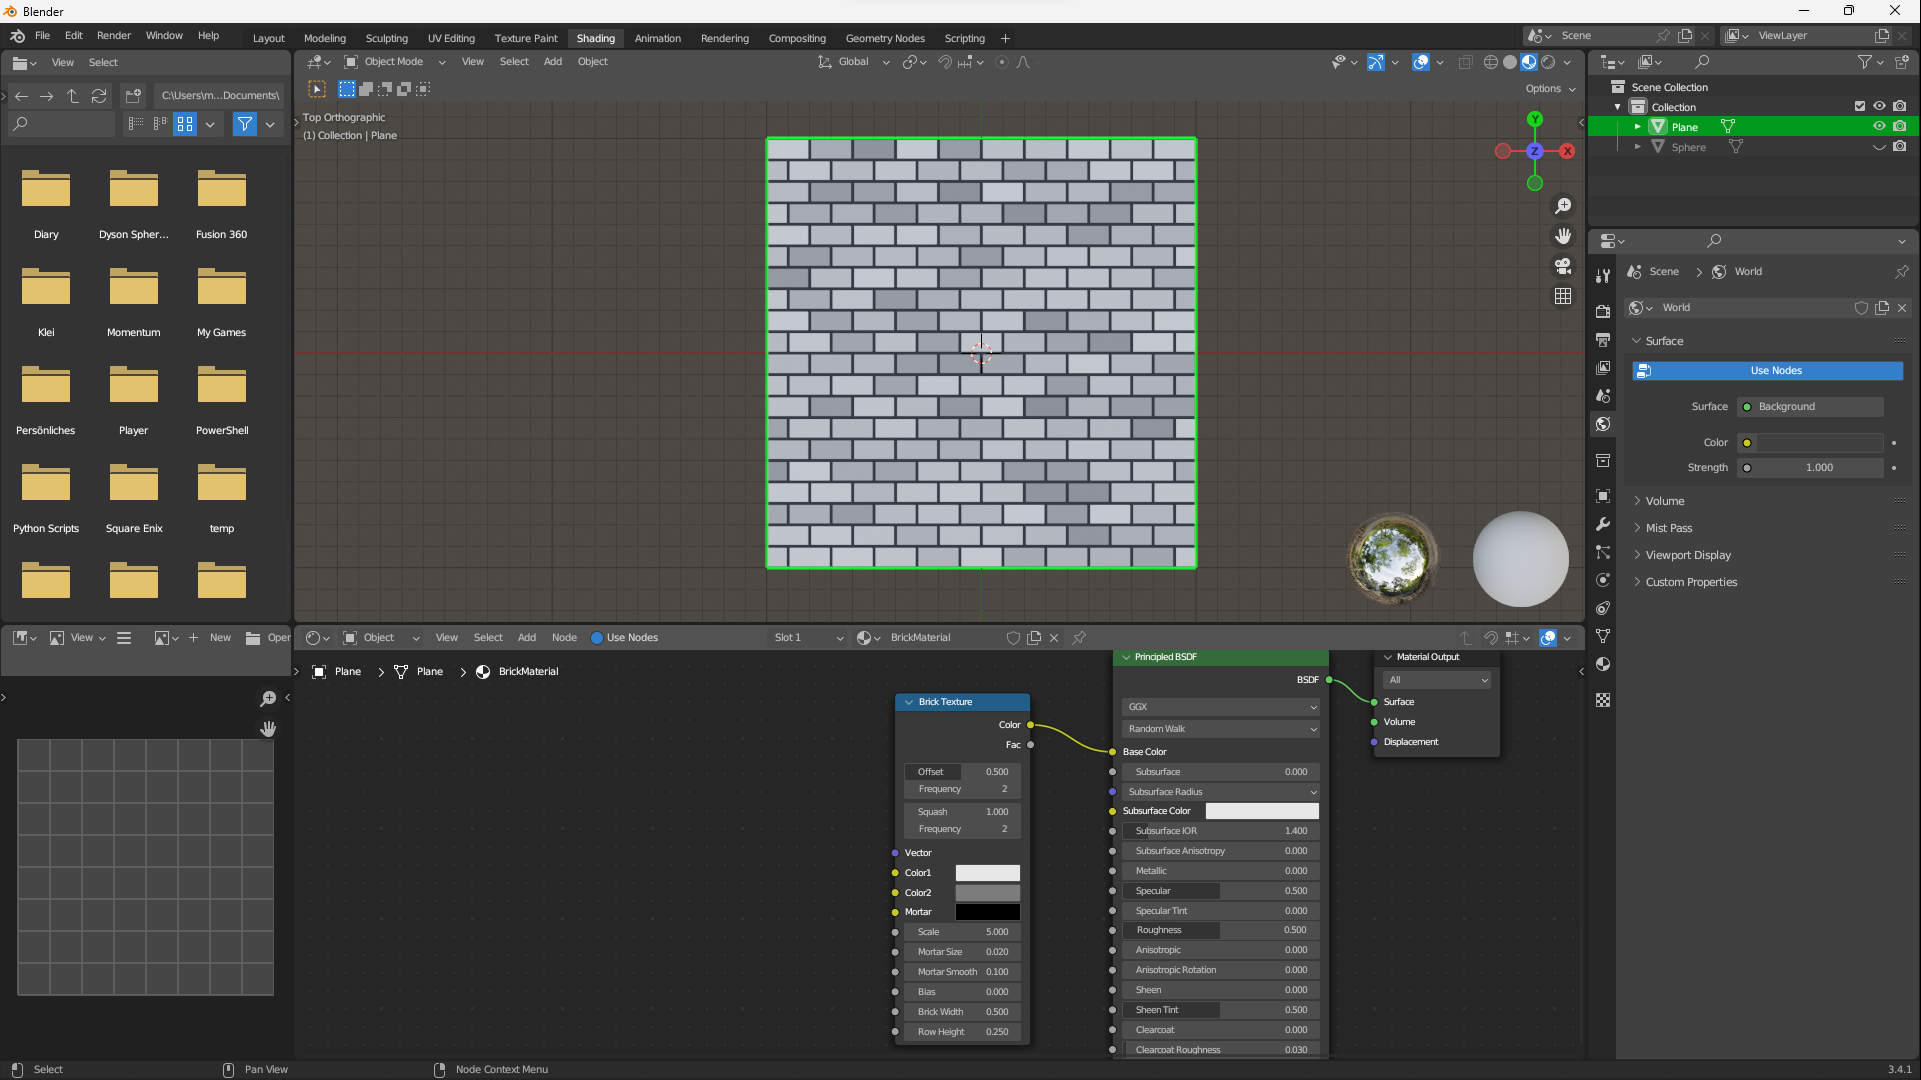
Now, we a Image Texture Node and create a new Image:
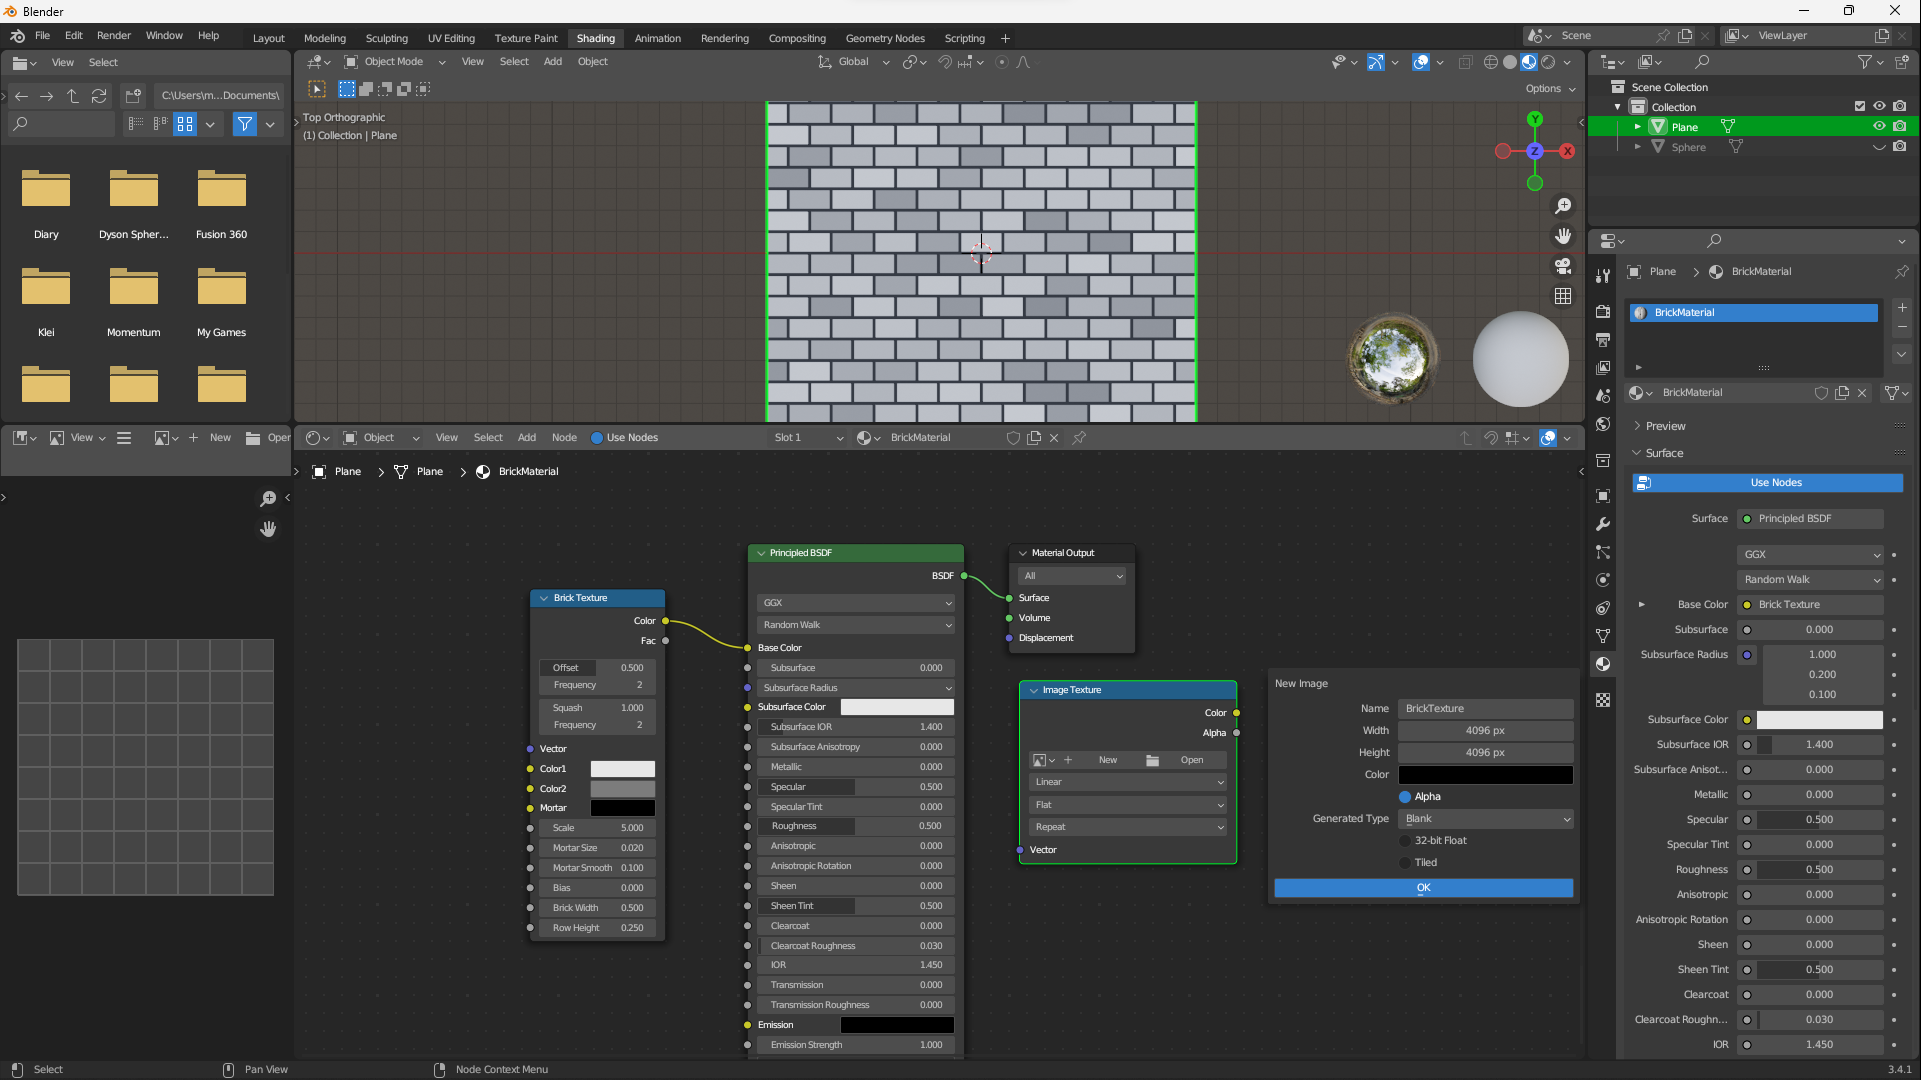
You should change the Name and Resolution of this Texture.
1024 x 1024 = 1k Textures
4096 x 4096 = 4k Textures
etc.
Change into Cycles if not already done:
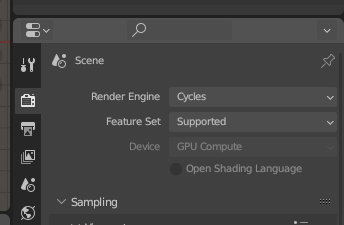
If you can it’s recommended to set Cycles to use your GPU. This will reduce rendering times by a lot.
Scroll down to find the Bake settings and apply the following:
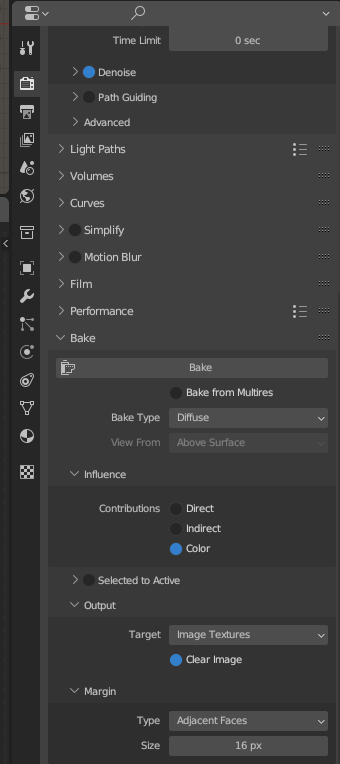
In our case we just want the color values, no shading, light, whatsoever. You may change this based on what your Texture needs.
Pay attention to the Bake Type too!
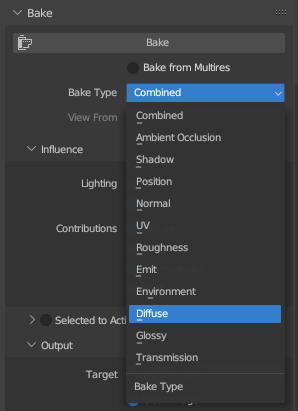
By default this will be Combined.
Like the name suggest, this combines all (most?) of the Bake Types into one image.
This may be useful if you want to extract multiple Texture Maps from one Texture later. But for our use-case we just want the Colors. This is called the Diffuse Map/Texture.
Alternatively, instead of using the Combined Bake Type, we can repeat the same process multiple times for each Bake Type we need.
Now hit the Bake button atop and wait!
At the bottom there will be a progress bar, depending on your hardware and Texture resolution this may take a bit.
Once done, you can view the Texture in the Image View:
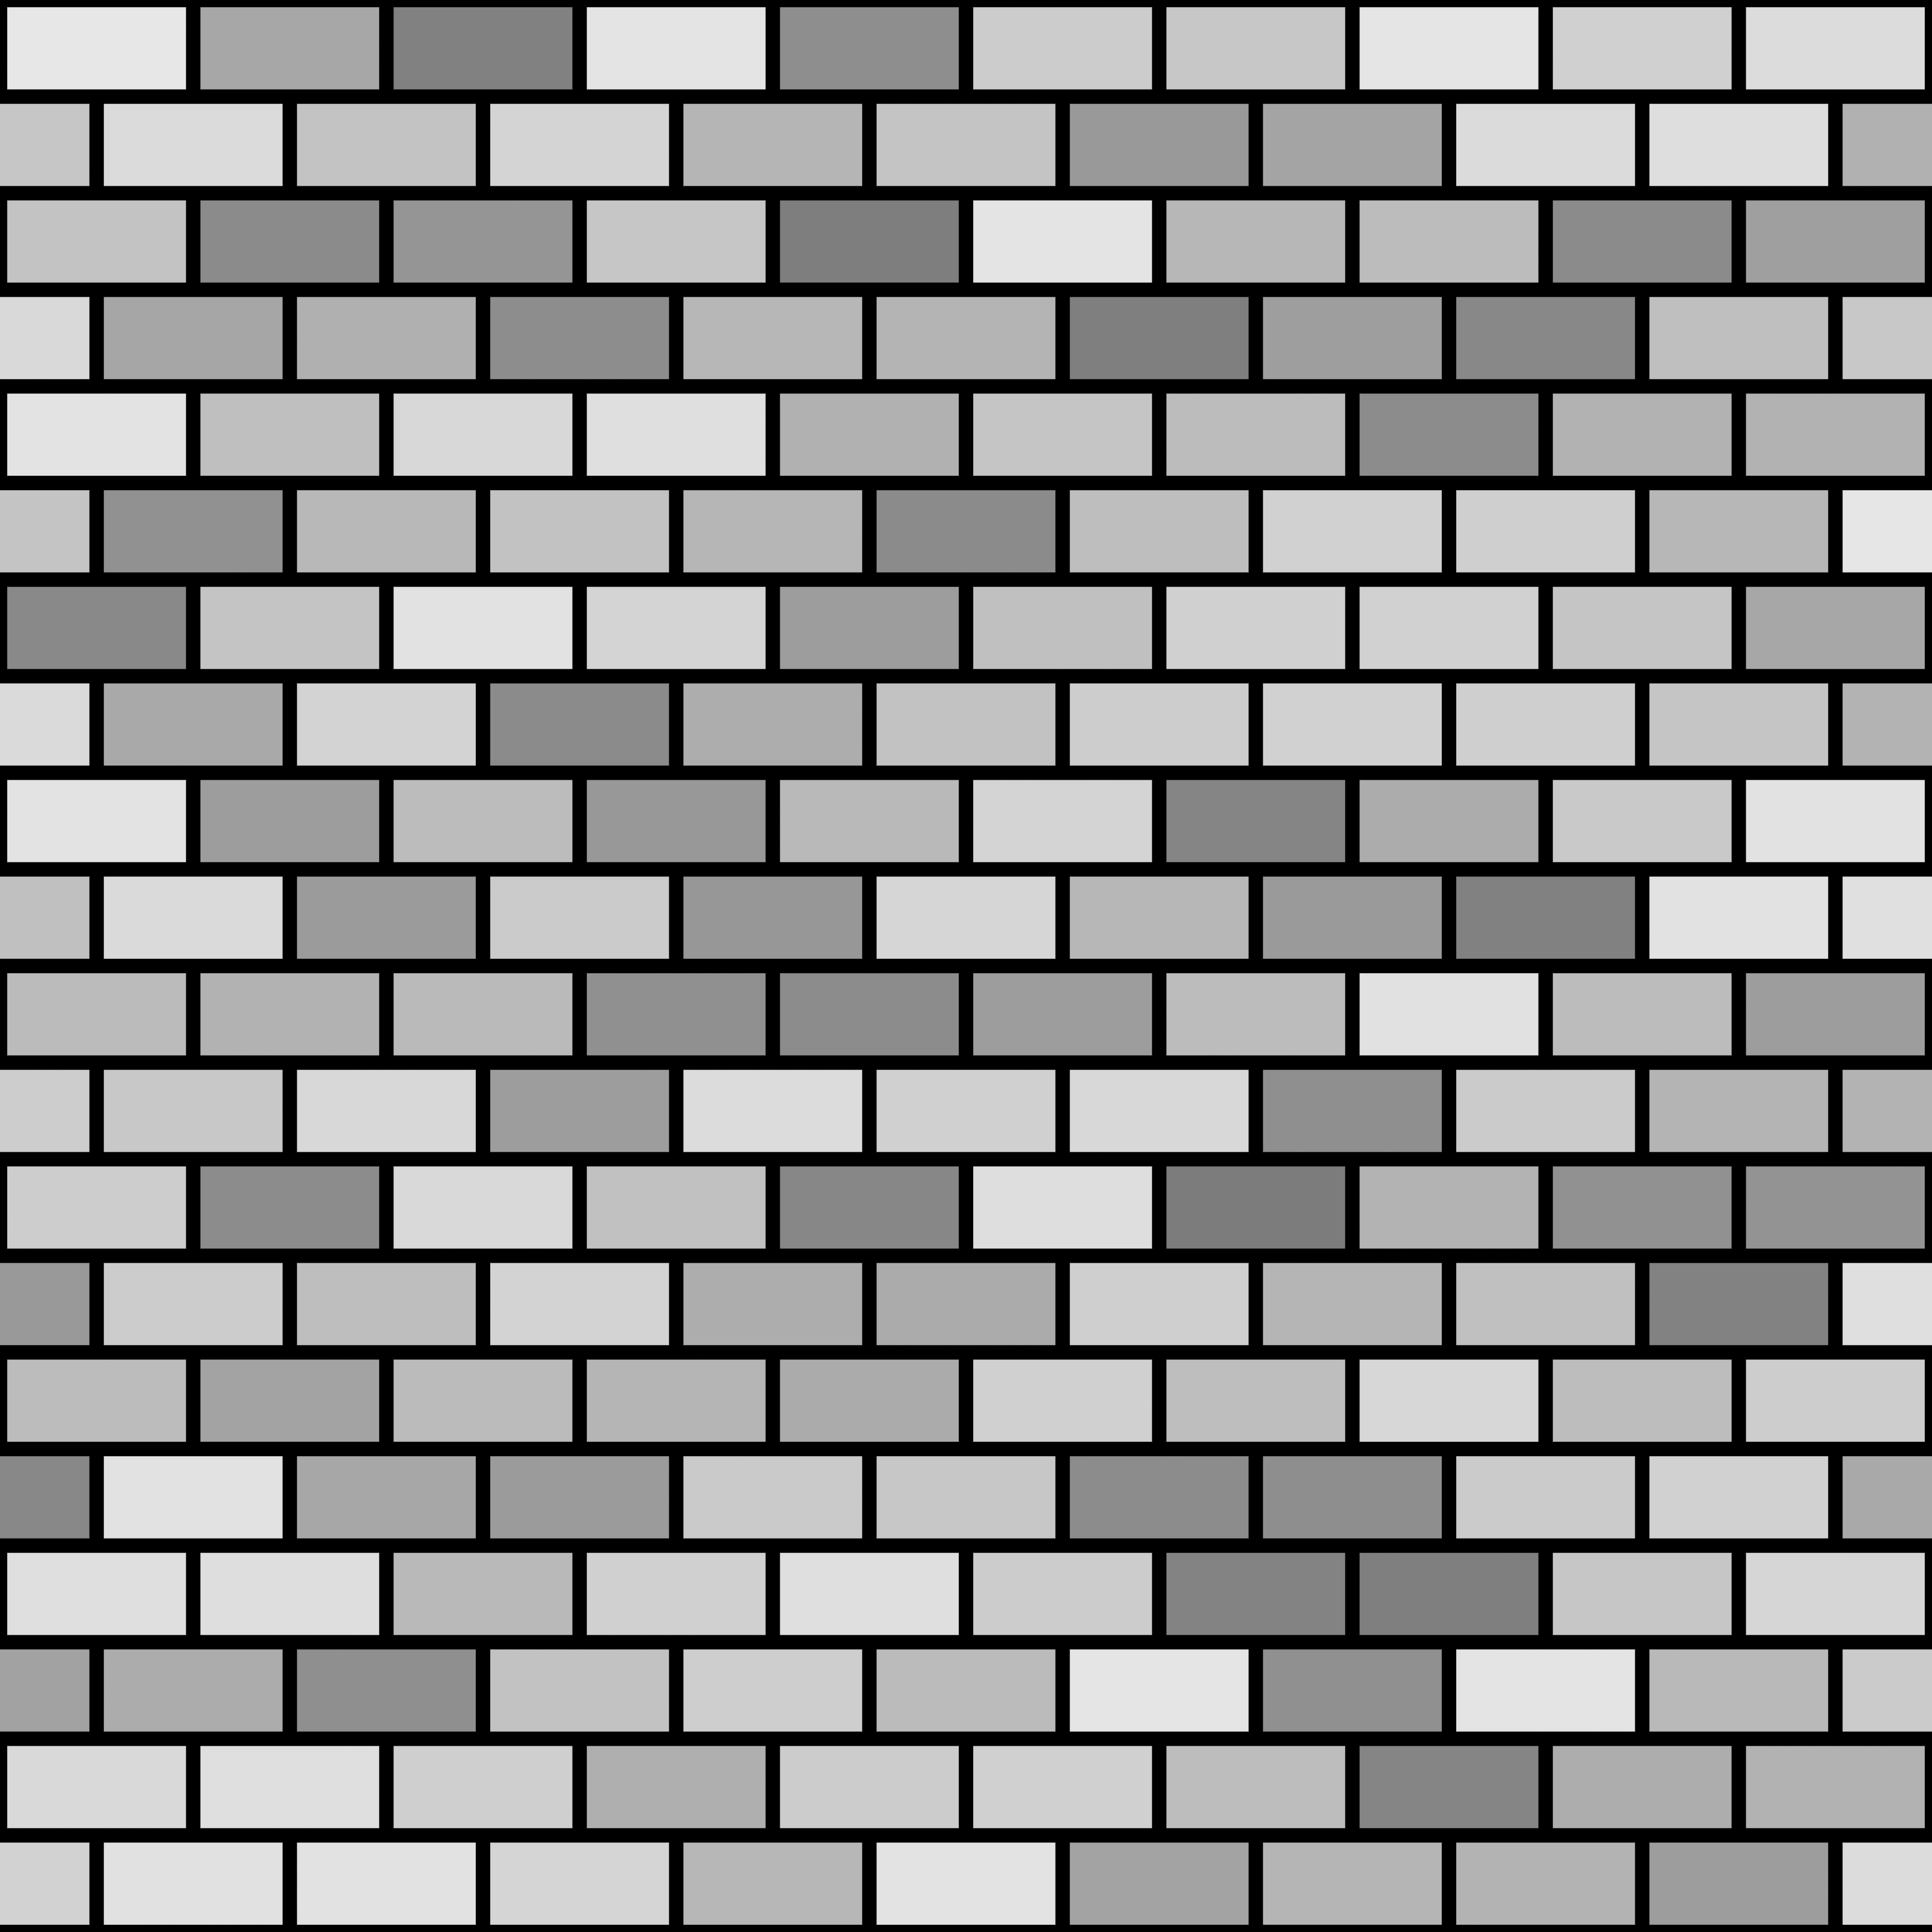
Double check that everything is looking as it should.
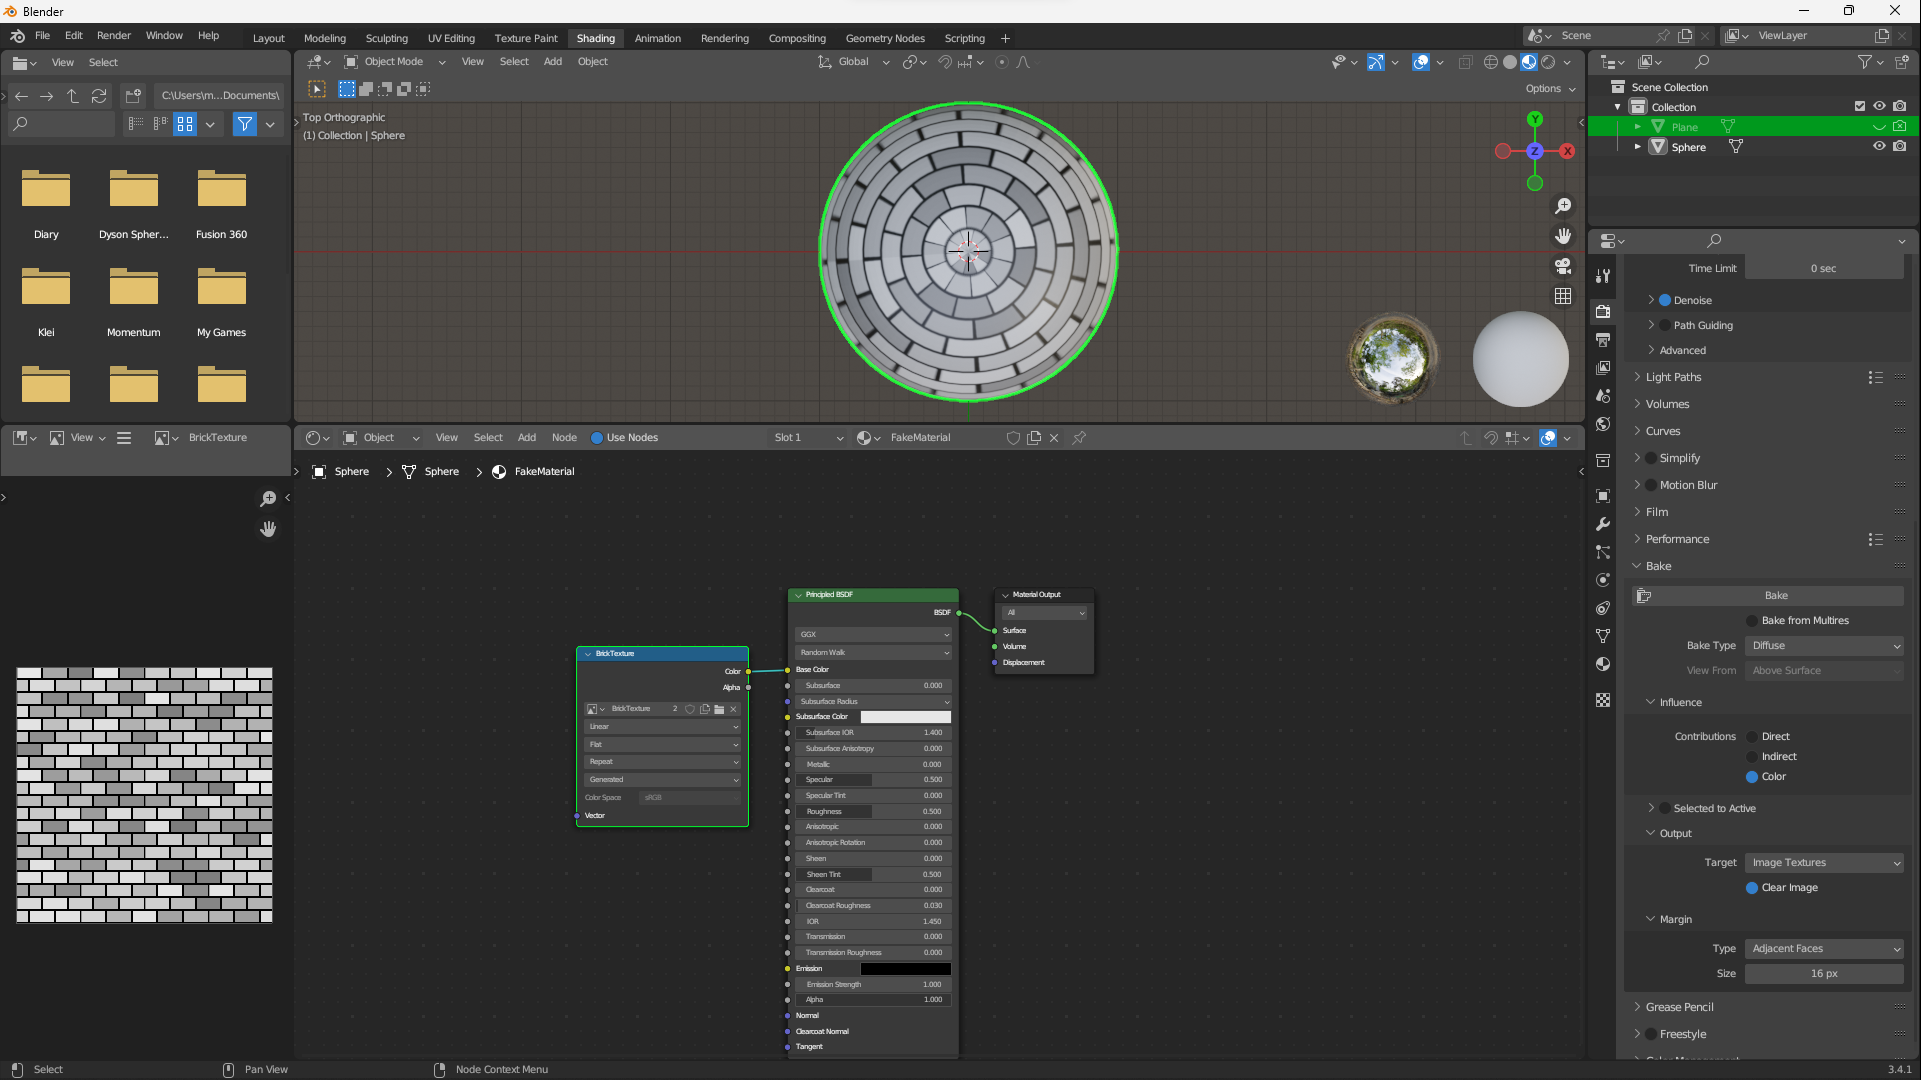
Now, we go back to our original Object and create a new “Fake” Material:

Make sure to disable viewing and rendering of the Plane and re-enable it for the Object!
Lastly, open this “Fake” Material as Shading Nodes, add the Image Texture Node and select (from the list, not “Open”!) the generated Texture. (Or, if you saved your Texture externally, click on “Open” and import it!)
Then hookup the Color like so:
If you have multiple textures, e.g. for Normals, repeat this step with the other textures and/or extract it from the
CombinedTexture.
If everything was done right the Texture should appear on the Object.
Now, optionally, based on your Object, you may still need to adjust UV Maps:
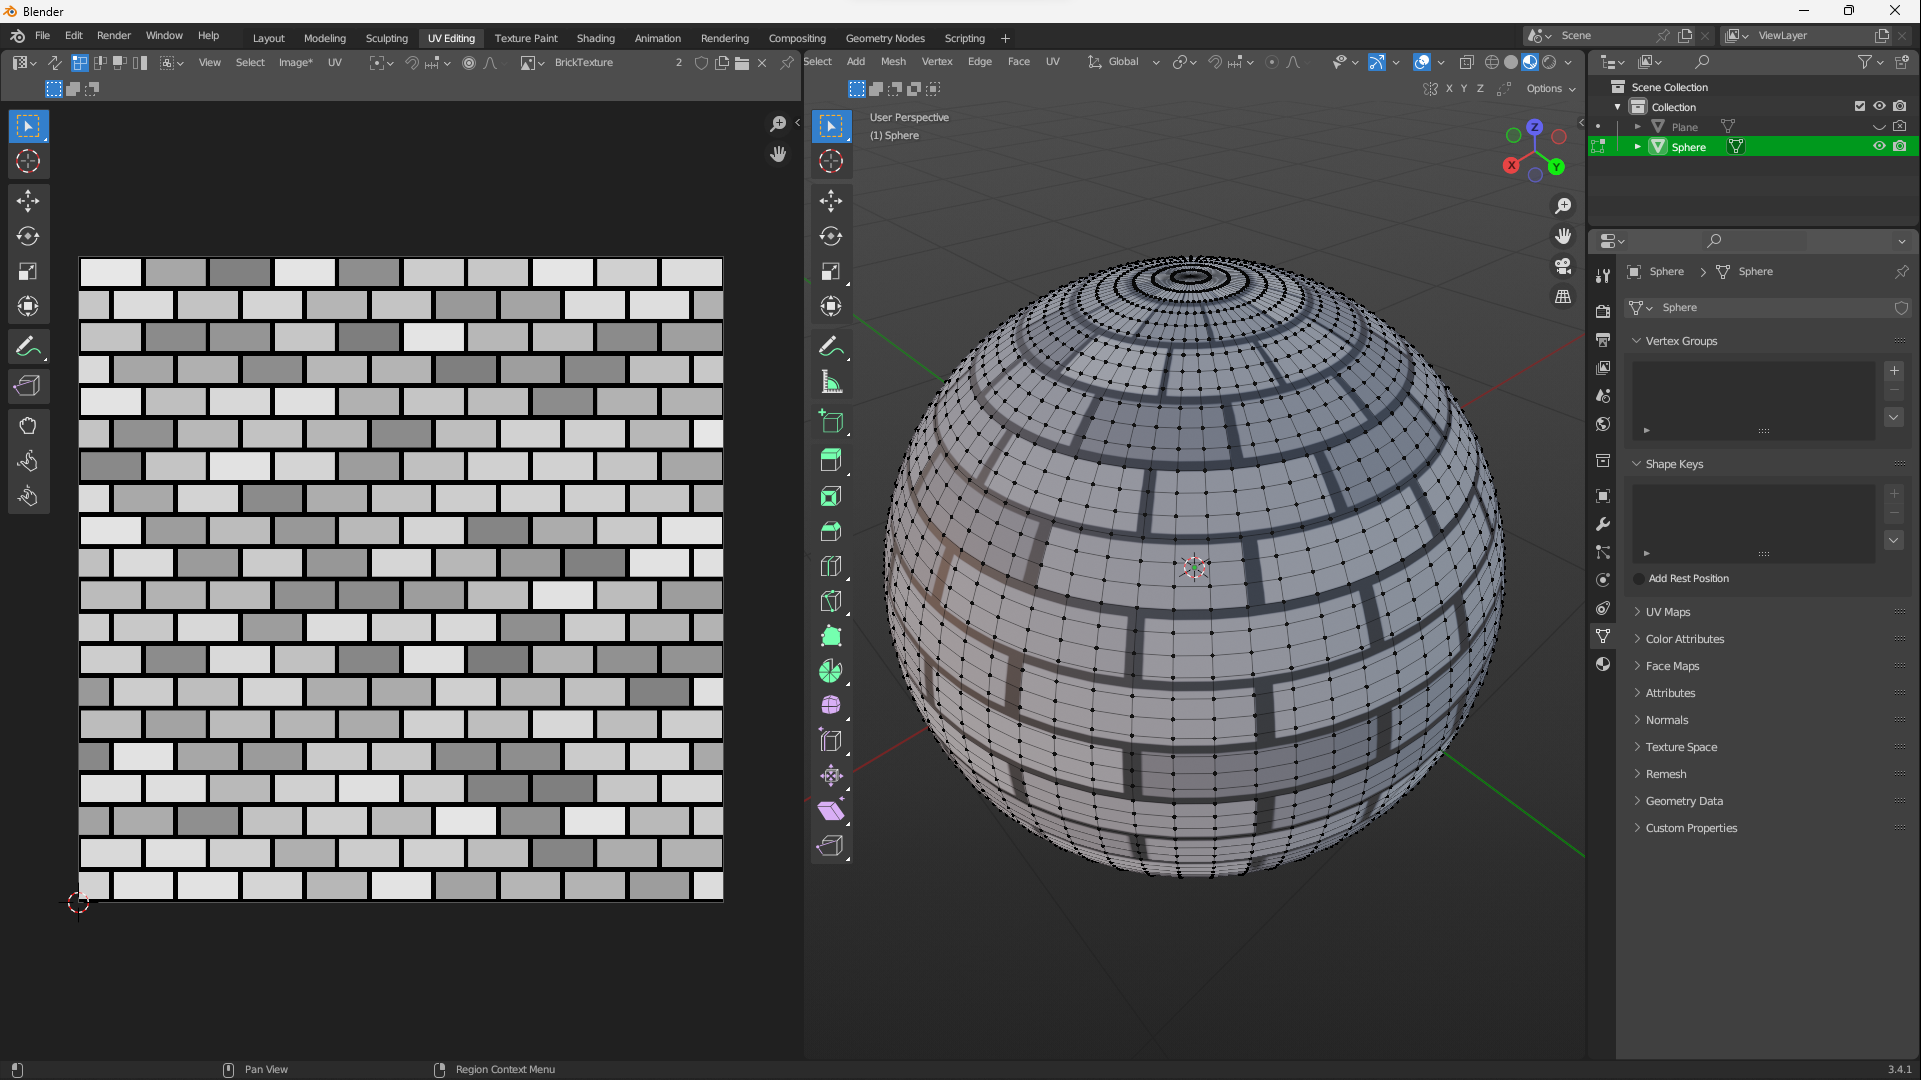
If you now export from Blender to glTF like above and import the glTF into Bevy, everything should be working perfectly fine.
Advice for Blender Project organization
Now that everything is exporting as it should, let me give some advice:
Textures/Materials are commonly used multiple times per different Objects. With this current setup the Material, Plane Setup, etc. would have to be repeated for each Object Blender Project. This will make organizing much more complicated, Baking must be done in different steps and re-using Textures/Materials is complicated if not impossible.
To solve this and make it much easier to keep organized we can use the fact that glTF can be universally used for Models/Meshes, Materials/Textures and Scenes. And that’s exactly what I am suggesting!
Create (for this project) three Blender Projects:
- One for the Material/Texture, includes the Baking process and packs the Texture inside the
.blend. - One for the Model/Mesh itself, will link against the Baked Texture from the first file.
- One for the Scene, where all the Models/Meshes are organized and put together into a Scene that can be imported into Bevy.
The beauty of this approach is that for as long as the linked .blend files are in tact and the paths didn’t change (which can be relative!), we only need to export from the Scene Blender Project.
This export will automatically fetch everything needed from the linked files. This includes Materials/Textures, Models/Meshes and everything that is required to successfully export.
The only downside of this is that we are now working with three files.
For each Material we would add a new Project File.
For each Model we would add a new Project File.
And we can’t edit linked Files from the Scene, but have to open the e.g. Material file itself.
We also need to make sure that changes are detected upstream. Meaning since we have this dependency order: Scene -> Mesh -> Material. And we change the Material (and bake it!), we need to make sure that our Mesh and the Scene gets updated with this change.
This should work out of the box with Blender, but just to be sure I may suggest keeping the total linked File-Count low.
Automated Exporting
Finally we reached the automation part. Blender does this quite easily actually.
Blender gives us a fully features Python API. Everything you can do in the Blender UI, you can do with the Python API.
Just… possibly a bit more complicated.
I have written two scripts, partially sourced from StackOverflow, that solve two issues:
Firstly, Bake Materials into Textures. This may only work if you are following the above suggestion of splitting the project into multiple Blender Files. For as long as there is just one Object and one Material, it should work flawlessly with any file. Even with multiple Texture outputs.
The Texture result will be packed into the .blend file.
Secondly, export a Mesh/Model (or Scene!) from Blender to glTF. The script will automatically apply all the settings and even save them for future manual exports.
The exact output location can be chosen via an argument.
Bake Script
Save the file below and use it like so:
blender your_blender_file.blend --background --python bake_all.py
This will automatically Bake and pack for us.
# Loosely based on:
# - (baking) https://blender.stackexchange.com/a/10861
# - (saving) https://blender.stackexchange.com/a/143043

import os
import sys
import bpy

BLEND_FILE_ARG = sys.argv[1]
BLEND_FILE = os.path.abspath(BLEND_FILE_ARG)

print("Processing '" + BLEND_FILE_ARG + "' (" + BLEND_FILE + ") and packing afterwards ...");

scene = bpy.context.scene
print("Scene: " + scene.name)

# Clear selection
for object in scene.objects:
    object.select_set(False)

# Bake
for object in scene.objects:
    print("Object: " + object.name)

    # Make the object active
    bpy.context.view_layer.objects.active = object
    object.select_set(True)

    # https://docs.blender.org/api/current/bpy.ops.object.html#bpy.ops.object.bake
    bpy.ops.object.bake(
        type = 'UV',
        use_clear = True,
        # https://docs.blender.org/api/current/bpy_types_enum_items/bake_pass_type_items.html#rna-enum-bake-pass-type-items
        save_mode = 'INTERNAL',
    )

    # Unselect after
    object.select_set(False)

# Pack it!
bpy.ops.file.pack_all() #Pack all images into the file

# Save it!
bpy.ops.wm.save_as_mainfile(filepath=bpy.data.filepath)
glTF Export Script
Save the file below and use it like so:
blender your_blender_file.blend --background --python gltf_export.py -- your_gltf_output.gltf
This will automatically export your Blender file to glTF.
To change the export format change the export_format='GLTF_EMBEDDED' below to 'GLB' (binary format), 'GLTF_EMBEDDED' (JSON-like format) and 'GLTF_SEPARATE' (JSON-like + binary packed format).
import bpy
import sys
import os

OUTPUT_FILE=sys.argv[-1]
OUTPUT_DIR = os.path.dirname(os.path.abspath(OUTPUT_FILE))

print("Blender export scene in glTF Format to file '" + OUTPUT_FILE + "' in directory: '" + OUTPUT_DIR + "'.")

# https://docs.blender.org/api/current/bpy.ops.export_scene.html#bpy.ops.export_scene.gltf
bpy.ops.export_scene.gltf(
    # Output File
    filepath=OUTPUT_FILE,
    # Don't warn if existing and overwrite
    check_existing=False,
    # glTF Light
    convert_lighting_mode='SPEC',
    # glTF Format
    export_format='GLTF_EMBEDDED',
    # Copyright
    export_copyright='Bevy-Game',
    # Image format
    export_image_format='AUTO',
    # Texture output directory
    export_texture_dir=OUTPUT_DIR,
    # What to export
    ## Careful with PBR textures!
    export_keep_originals=False,
    export_texcoords=True,
    export_normals=True,
    export_tangents=True,
    export_materials='EXPORT',
    export_original_specular=False,
    export_colors=True,
    export_attributes=True,
    use_mesh_edges=True,
    use_mesh_vertices=True,
    # No compression (Bevy doesn't support)
    export_draco_mesh_compression_enable=False,
    # Selection of what is exported (everything "visible")
    use_visible=True,
    use_selection=False,
    use_renderable=False,
    use_active_collection_with_nested=False,
    use_active_collection=False,
    use_active_scene=False,
    # Camera will be added by Bevy
    export_cameras=False,
    # Lights will be added by Bevy
    export_lights=False,
    # Anything special (might break things!)
    export_extras=True,
    # Axis for export (Y+ Up)
    export_yup=True,
    # Apply modifiers
    export_apply=False,
    # Remember export settings, nice for debugging!
    will_save_settings=True,
)
Afterwords
I hope this will help anyone. I’d wish I would have found such a resource and wouldn’t have figured all of this out myself.
As mentioned before, if you run into any trouble, need help or found an issue with my write-up, please open an issue or start a discussion on my GitHub repository!